Perhaps before we begin, I should come clean and say that, I’m not the greatest fan of hooped bivvies. However, I should also clarify that statement by saying, my preferences are purely personal and many people either like using a hooped bivvy bag or are at least drawn to the concept and idea of a bag with an integral hoop.
Okay, now we’ve got that out of the way, just what are the likely benefits of using a bivvy of the hooped variety? Extra space and additional coverage are the obvious things really. Aside from offering a degree of headroom (faceroom?), many are often wider and longer than their non-hooped brethren so can feel less cramped; although please don’t go thinking that there’ll be any cat swinging taking place. The issue of increased coverage or protection is two-fold. Firstly, there’s rain and wind but there’s also the midges, slugs and the like to consider. As far as I’m aware, all hooped bivvy bags can be completely closed up* leaving you safely cocooned from the elements outside which should take care of the wet and windy part. They also feature an additional ‘door’ panel made from mesh which can be closed independently of the main ‘door’ and thus safeguard you from the biting / slimy things while maintaining maximum ventilation. However, you don’t get anything for nothing in this game, so if room and protection are the plus points of a hooped bivvy then what are the drawbacks? Realistically, weight and packsize will usually be the significant downsides; A pole or possibly two, pegs, lines plus additional material and hardware will always push up the weight when compared directly to something without aforementioned bits and it’s your task to decide what your priorities are and which compromises you’re willing to accept. Depending on the answers to those questions, then a hooped bivvy bag may prove to be your ideal shelter or the worst thing you’ve ever slept in.
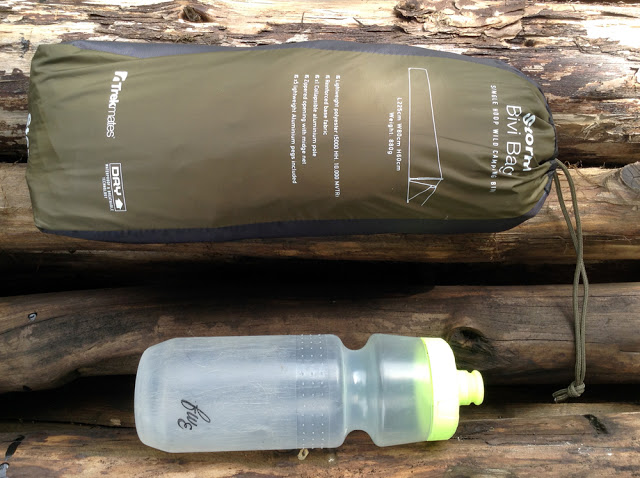 |
Packs up to a reasonable size and it’s not too heavy.
|
If you remain ‘hoop curious’ then, you might be interested to look at the new Storm bivi from Trekmates. I suppose you could describe it as a classic hooped design with a single pole and a full zipped door over the entrance at the head end. On paper, the numbers look very good, A hardwearing floor with a HH of 10,000, a waterproof breathable upper with a 5,000HH and a breathability rating of 10,000MVTR … if you’re wondering whether that’s good, I can tell you that those figures mean the material would be considered both fully waterproof and very breathable. The whole thing appears neatly put together with taped seams and includes a set of Y section aluminium pegs. Folded pole length is often an issue when it comes to shelters and bikepacking but the Storm’s pole folds to a length of just 32cm, so finding it a happy home when packing shouldn’t present much of an issue. Weight is also respectable for such a beast, tipping the scales at 880g all in.
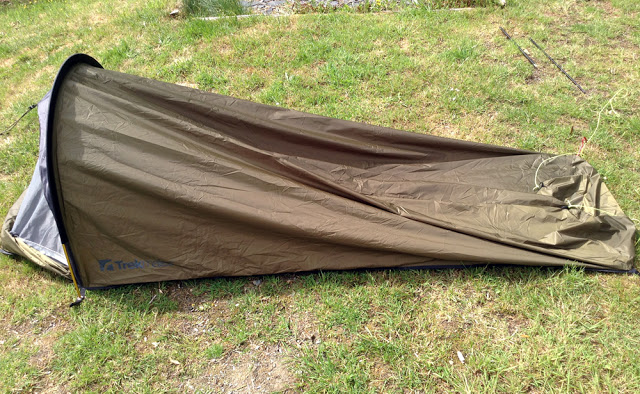 |
When set-up as intended, I wonder if people might think they’ve done something wrong?
|
As you can no doubt imagine, setting up is simple and swift; thread the pole through the outer sleeve, peg the base down followed by the line from the head end and that’s it. Really it shouldn’t take more than a couple of minutes which in itself will no doubt add to the potential appeal for some. However, I can imagine that once set-up, some people may be left wondering what they’ve done wrong because in all fairness,it’ll look a bit sorry for itself; you may have a nice and inviting looking shelter at the top but it’s a different story down towards the bottom. Rest assured, this is simply the nature of such shelters. In most cases an additional support can be improvised by way of a pole, stick or handlebars to raise the foot end which in turn will provide a greater feeling of space and perhaps more importantly, help prevent rain from pooling on the surface … some manufacturers even provide a tie-out loop to aid you.
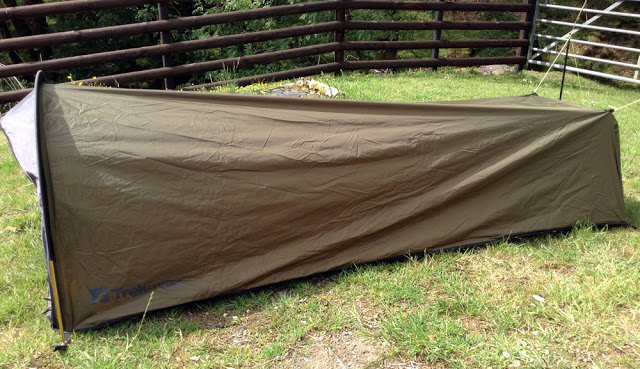 |
However, with the addition of some end supports, things start to look better.
|
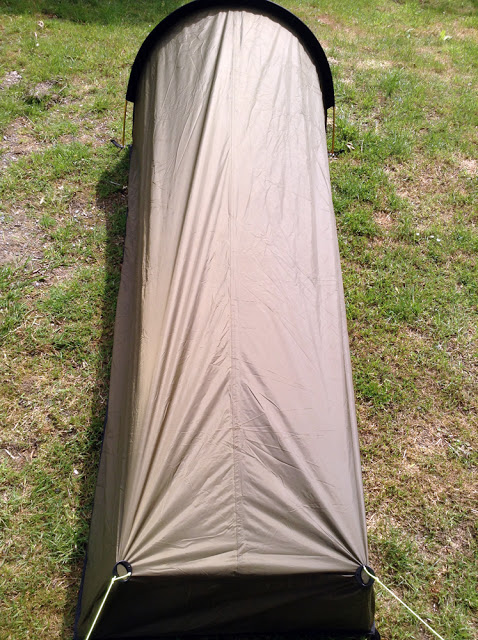 |
| There’s certainly more room and it’ll allow much less water to pool on top. |
Sadly, the Storm doesn’t have such a tie-out and the foot end is also square rather than round or triangular which means two things. Firstly you’ll need to use some type of clip or other cunning device to attach a line and secondly, you could really do with two additional supports rather than one. If you straddle those hurdles then you’ll be presented with a shelter that perhaps looks a little more like the mini-tent you might have been expecting.
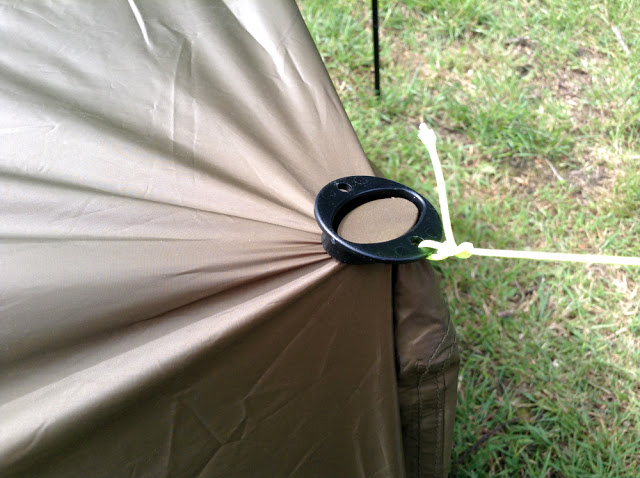 |
| Smaller clips are available but these were on hand and do the job. |
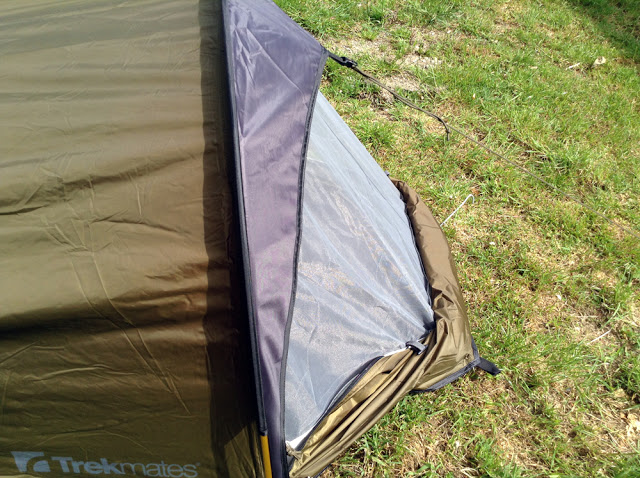 |
| Centre guy line could make entry a little trickier than it needed to be perhaps? |
While it may appear that the addition of a hoop will likely ease access, the line required to hold everything in place might in fact do the opposite. As you can see, it’s attached in the centre of the bag and is likely to be something of a hindrance to crawling in and out. It is possible to angle the line to a degree but perhaps fitting two lines positioned lower down might have been a better solution?
As the above picture also highlights – maintaining reasonable ventilation in bad weather could be tricky. If the top cowl was extended then it would be possible to leave the main door much further open without rain finding its way inside. As it stands, the only workable option I can see is to unpeg the base and draw it inline with the cowl so water can’t drop through the mesh (you can see what I mean in the third picture from the top, which shows the floor pulled inwards). In reality it’s quick and easy to do and doesn’t reduce the internal space overly but as with the addition of tie-outs, it’s often the simple things that make all the difference.
All in all, first appearances look okay. Yes, there are a few quirks and a couple of additions would perhaps improve things but these are by no means limited to the Storm Bivi and you will find very similar on shelters costing three times what the Storm does. If you do a little shopping around then it can be found on-line for as little as £65. In the world of the hooped bivvy, that is something of a bargain … but only if it works. I shall carry it up a mountain shortly and let you know.
* While this is possible, I really wouldn’t recommend it. I would also make sure that your bag is made from a gas permeable material – if you’re at all in doubt, then always leave the door open a little to provide ventilation.


What are the clips? I've got an old hooped bivi, and these (Possibly smaller ones) look to be just the ticket.
I'd be interested in what clips you used as well
I'll just step in here…
https://www.ultralightoutdoorgear.co.uk/equipment-c3/accessories-c10/cord-clips-buckles-c86/gram-counter-gear-grip-clips-p447
Trep' saves the day – thank you.