I crouched twenty yards back from the waters edge, desperately trying to coax my damp lighter back into life. From the furthest corner of my eye, something caught my attention. It was big and seemed completely out of context with its surroundings, I stood to get a better view. It was a boat, a large wooden boat, rough and ready, displaying all the hallmarks of having being built in a hurry. To see such a thing floating down this usually quiet stretch of river was certainly unusual but the bearded old man chasing two errant Orangutans round the deck, was a sight I’ll never forget … If you’ve spent anytime in the UK over the past few months, you couldn’t have helped notice that it’s been rather wet, probably the wettest few months since Noah first set sail, so what better time to be testing out the SOLO wood stove?
I wrote a brief introduction to the SOLO stove a while ago which outlines the general design principles of a wood-gas stove and highlights some of the specifics of the SOLO stove … all well and good, I’m sure you’re thinking but the real question is, “what’s it actually like to use?”
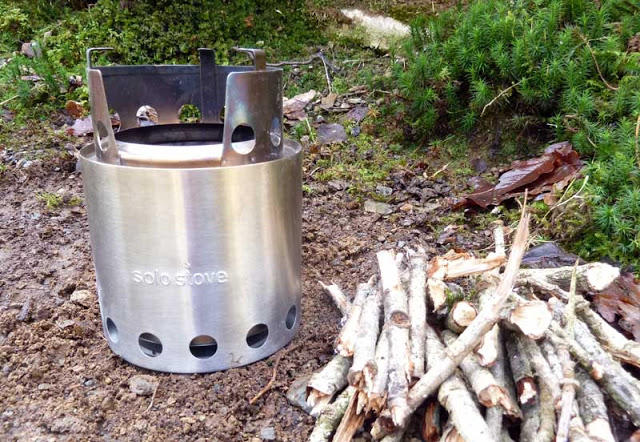
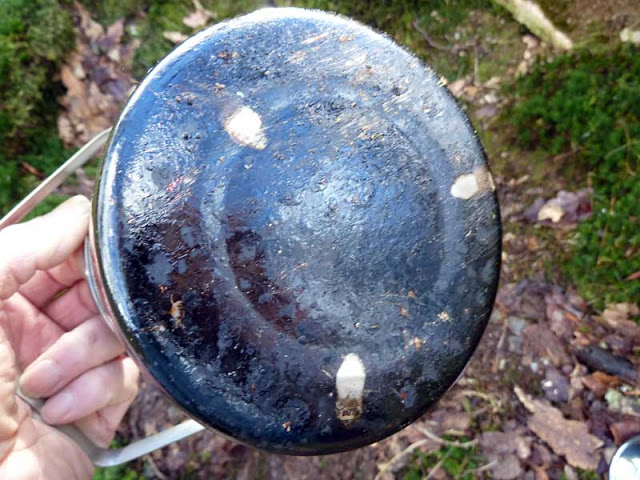
I mated the stove up with a 12cm stainless Zebra pot, firstly because the stove will fit inside the pot and secondly because Zebra pots are tough and comparatively cheap. Even the most efficient wood burner will produce soot and sticky deposits, so in my opinion, using a pot you’re less concerned about makes a lot of sense. I took to travelling with the stove inside the pot (in its stuff sack) and made another stuff sack for the pot to live in. This way, I wasn’t getting the inside of the pot dirty and the outside of pot wasn’t able to dirty anything else. Packed like this, there was still enough room inside for a lighter and some small pieces of kindling. Obviously, you can choose to use any type or size of pot you like but for me this combination works well and would certainly have enough capacity if you were cooking for two.
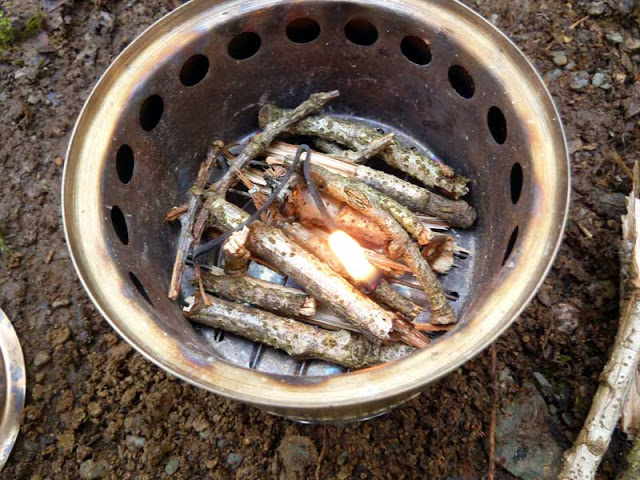 |
| Make a twig platform then add tinder – inner tube in this case. |
I’ve always believed that no matter how bad the weather, you can always find something dry enough to burn … after the last few months, I now believe that, you can always find something dry enough to burn if the stove’s already going. Once you have a fire, then it’s surprising just what will burn. Sure, damp wood will produce a bit more smoke and things won’t be working at their optimum but you’ll still be able to cook – sadly, trying to actually get a fire going with damp wood is an altogether trickier proposition.
With a little effort and application you can usually prepare enough dry wood to start your fire (more details about that here if you’re interested) without resorting to any type of accelerant beyond a few sweet wrappers, scraps of paper or scavenged crisp packet. However, I’m ashamed to report that recently, I’ve twice had to employ a small piece of Esbit tablet in order to achieve full ignition. I should point out, that’s in no way a failing of the stove, it’s simply circumstance and the consequence of the seemingly never ending rain. I’m also fully aware that some people wouldn’t see any problem with using an additional fire-lighter and that they might even assume it was a prerequisite … so maybe, I’m being a little hard on myself there?
 |
| Keep feeding it and it’ll keep burning. |
I’ve found the best way to light the stove is to first lay a number of twigs across the mesh in the base. These give you something to start your fire on and will also help form a nice, hot bed of embers. Next, light your tinder and place it on top – Esbit, Doritos (yes really), piece of old inner tube, etc. Once you’re sure it’s going, slowly place some very small (smaller than you think) twigs around the tinder. The dryer your wood at this stage the easier things are going to be, if your wood’s even slightly damp you’ll need to do this bit gradually, otherwise you’ll put the tinder out.
Once this first lot of twigs has ‘caught’, you can start to add some more. How much you can add at any one point is largely going to be determined by the condition of your wood, the type of wood and the size. In reality, you soon get a feel for it but if you’re in any doubt, smaller is better than bigger and dryer is obviously better than wetter. You might not have very much choice in what species you get to burn but if you do, look for Spruce, Fir and Birch … once the stove’s going fully, Ash is another species worthy of consideration.
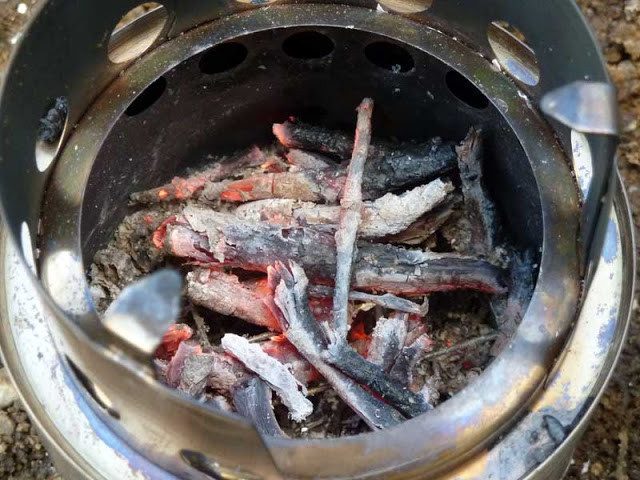 |
| They don’t look it but they’re very hot. |
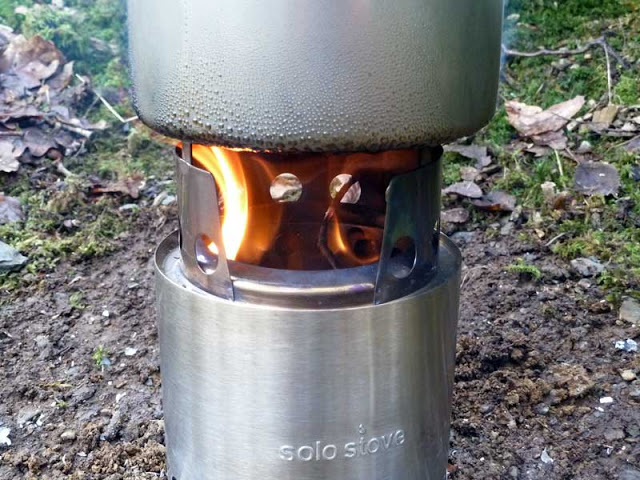
Once burning properly and with your pot on top, the ‘window’ in the stand is more than big enough to let you see exactly what’s going on inside. I’ve found the stove’s most efficient if you maintain the fuel level about 5mm – 10mm below the inner air holes. This seems to produce a thick, hot layer of embers which quickly ignites each new piece of fuel and helps maintain a reasonably steady temperature output.
We’re used to measuring a stoves performance in the minutes and seconds it takes to boil a quantity of water but there’s so many variables when burning wood, that it almost becomes impossible. In all honesty, any figures would be largely meaningless. Perhaps, it’s much better to simply say that when conditions aren’t perfect, the SOLO stove’s pretty fast. Should everything be in your favour – it’s very fast. What can take time, is getting it lit but again that’s just the nature of the beast rather than the stove. A little practice and experimentation can make all the difference here. I was never unable to get the stove going, even in the recent conditions. On occasion it did take a little longer than I’d hoped but that probably says more about my stubbornness in resisting firelighters and tells you more about the weather than it does about the stove.
What about weight? I already mentioned in the previous post that the SOLO weighs 255g but obviously, you also need to add the weight of your pan, pot, mug whatever to get the full picture. It would be perfectly possible to use a 90g Ti or alloy pot and produce a sub 400g set-up which is around 200g lighter than a ‘fuelled-up’ Jetboil or similar. The Zebra pot I’ve been using weighs considerably more than 90g and pushes the combined weight up to over 600g … not particularly light but when you consider that there’s no additional fuel to carry and the pot’s large enough for two, it starts to sound much more reasonable.
 |
| To a degree it’s inevitable but dry fuel will lessen it considerably. |
The SOLO stove isn’t a stove for the lazy or the ‘can’t be bothered’. It’s a world away from turning a nob and pressing a button, there’s a level of input required which means it isn’t for everyone. It’s not the perfect stove for all conditions or under every circumstance, I certainly wouldn’t carry one one the Highland Trail for example but for the times when you’re ‘riding to camp’ rather than ‘camping to ride’, it certainly makes a viable option. It does exactly what it’s designed to do and it does it well … but just remember, if it won’t light, goes out or generally refuses to behave, it’s not the stove that’s failing … it’s you.
SOLO stove – available from lots of outdoor retailers for around £60.


Looks interesting, thanks for the review 🙂
As long as you're wiling to invest a little time with it James, then using it (and any wood stove really) can be very rewarding. I imagine it would be especially good for anyone who takes kids out with them.
Is there any online info about making your own wood burner? I'm sure it's a subject I've seen but I have no idea where!
http://www.funkyleisure.co.uk/wild-woodgas-stove-mk-iit-3734-p.asp
Here you go Stephen, instructions on this very site: http://bearbonesbikepacking.blogspot.co.uk/2012/11/myo-eco-friendly-sustainable-renewable.html