Single Speed Conversion
Posted: Tue Nov 15, 2016 1:52 pm
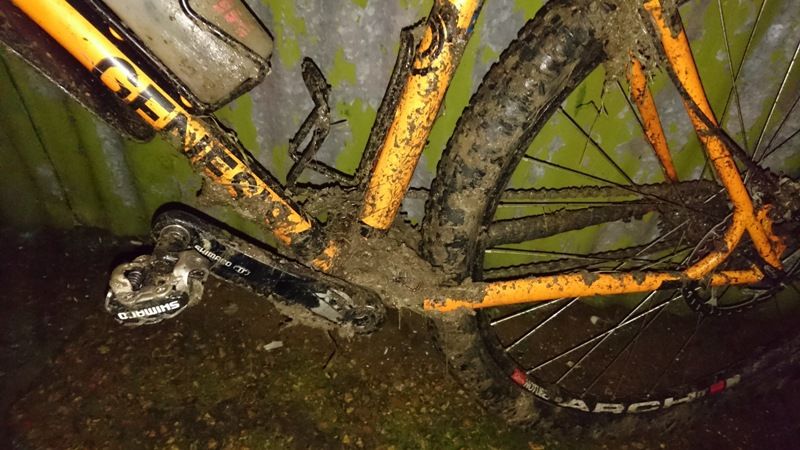
Thought some of you might be interested in the conversion of my geared frame to singlespeed. I'm usually a singlespeeder but when I bought the Genesis frame I'd been riding a geared bike for a few months and thought that it would be ok to not have an ebb or sliding dropouts. It didn't take long to realise that I missed the simple life and so converted the bike to singlespeed. At first I thought I was lucky as it seemed to work with a magic ratio using the sprocket, chainring and chain from my other singlespeed. As the chain wore I decided to fit a new one and then discovered that the magic ratio only worked as the chain was part-worn when fitted and a new chain was too tight. I fitted a bb mounted tensioner and this was ok but the wheel only had an outer bearing and once muddy and wet the chain would slide over it rather than spin the wheel. I tried a rear tensioner but the shrouded dropouts limited the range of movement. I also had the my first puncture in years that the tubeless sealant didn't seal and removing the wheel was a pain as I had to unbolt the tensioner. I decided that a proper conversion was required. I considered using an ebb in my threaded shell but these have limited movement and I would no longer be using my preferred Hope BB. I thought about replacing the BB shell myself but then thought this might be a bit risky if it went wrong. I tracked down a frame builder who said they could fit sliding dropouts so I sent the frame off to them but 17 weeks later it returned with a note to say he couldn't get dropouts to match the angles of my stays 
I then decided to revert to fitting a new BB shell myself, what's the worst that could go wrong? I bought the shell from Ceeway and a Bushnell EBB from Charlie the Bikemonger and got to work.
I made a jig to hold the frame parallel to the bench by measuring the size of the tubes and then selected/made spacers to suit.
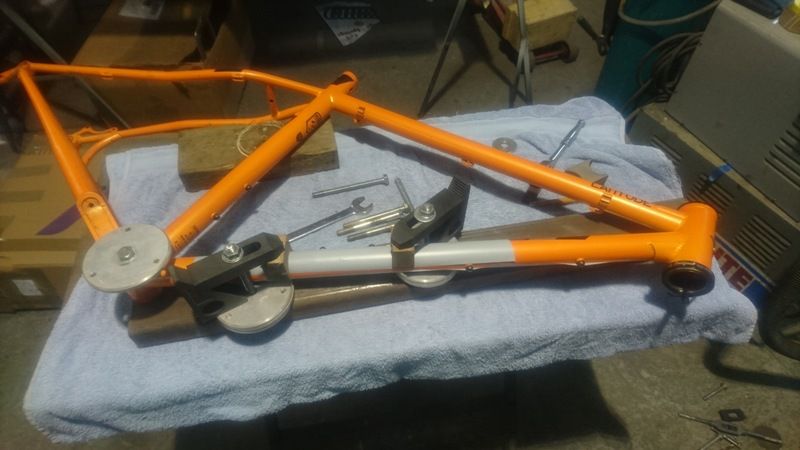
Checking the frame is set correctly on my surface plate. The jig holds the frame such that the BB is 90 degress to the main steel section on the jig.
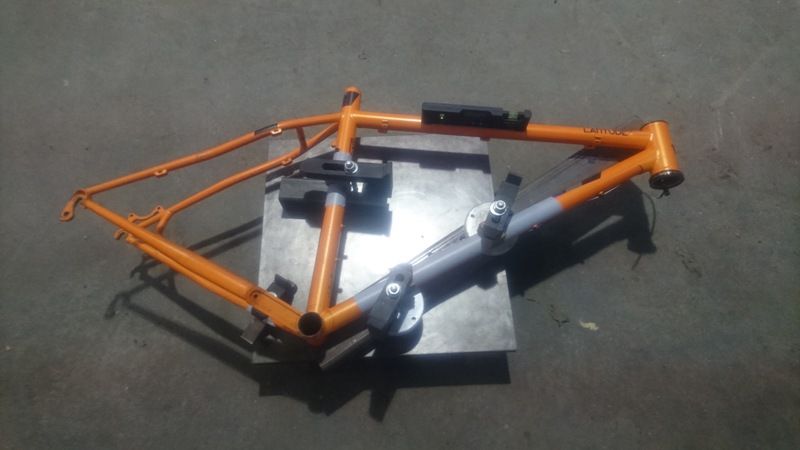
I then mounted the whole lot on the drill bed and cut out the old BB shell with a holesaw.
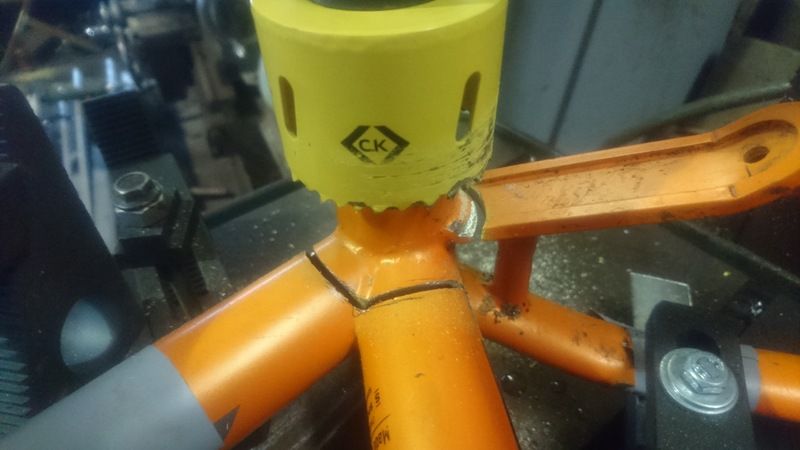
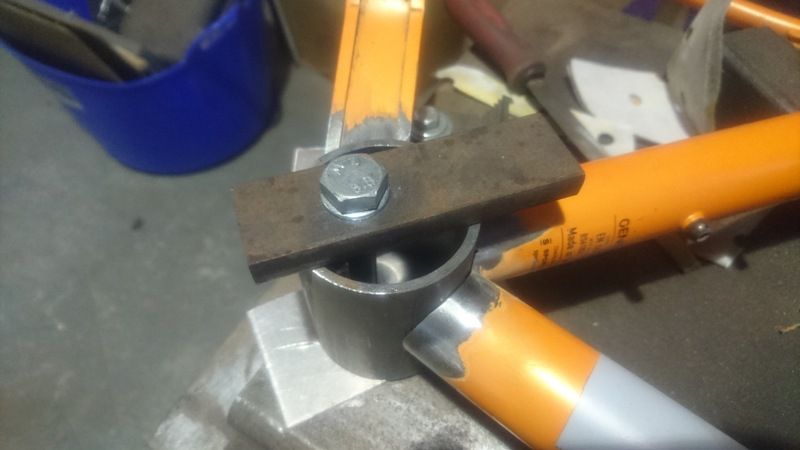
Checking the fit of the new BB shell, I had to fettle the cut on the tubes to get this to fit as I wanted. The top plate holds the BB shell in place for welding and the bottom one spaces it up as it's narrower than the threaded shell which was cut out.
I cleaned it all up with a small shot-blasting gun to get it nice and clean for welding.
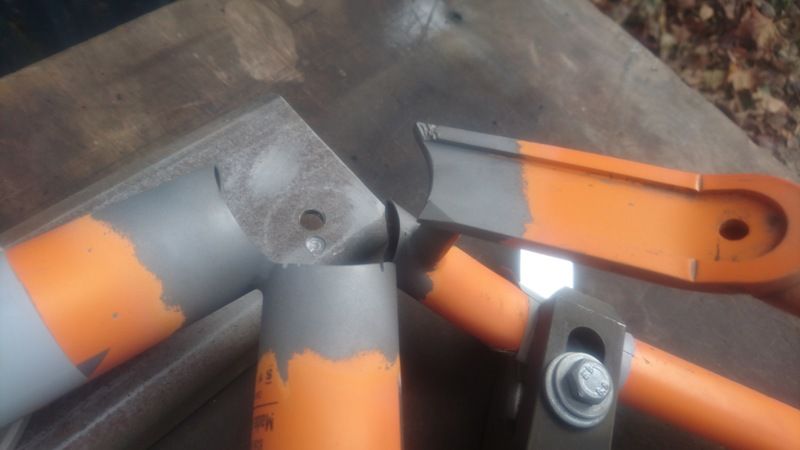
I did consider welding it up myself as I have a small DC TIG but I've not used it in a few years so I'd have to get some Argon for shielding and get some practice in. I tracked down a friend of a friend who welded it up for me.
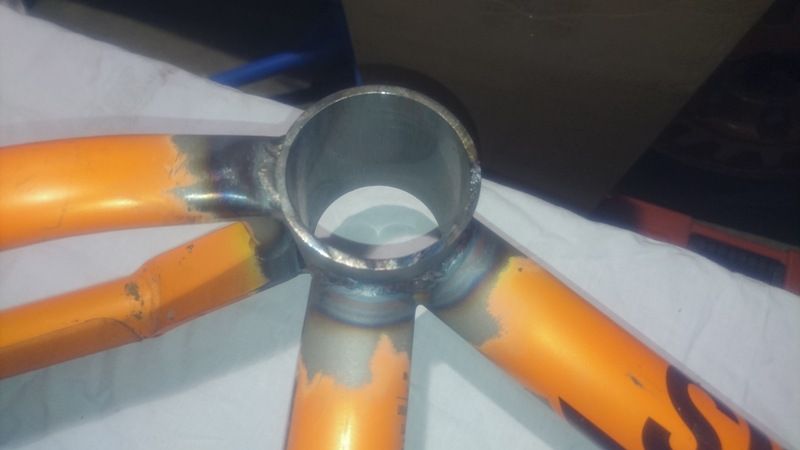
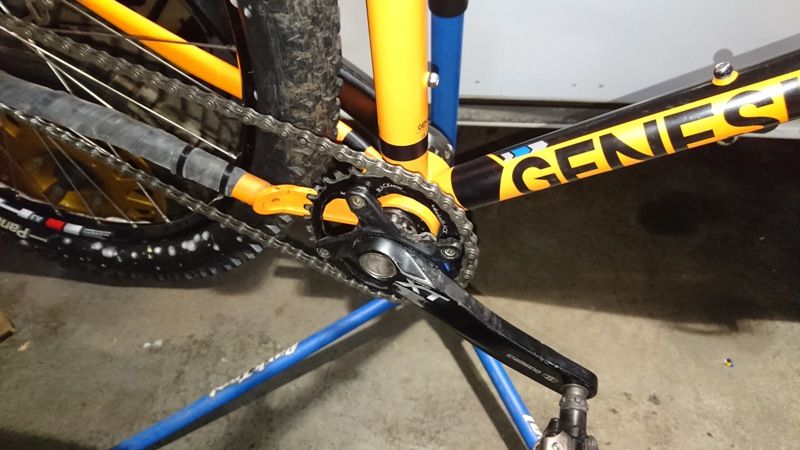
After painting the area and new BB shell I fitted the EBB. The new paint isn't the same shade as the original frame so I added some decals on the line where the colour changes to hide it. You can see the change in colour on the inside of the non-driveside chainstay but this is hidden with the wheel fitted.
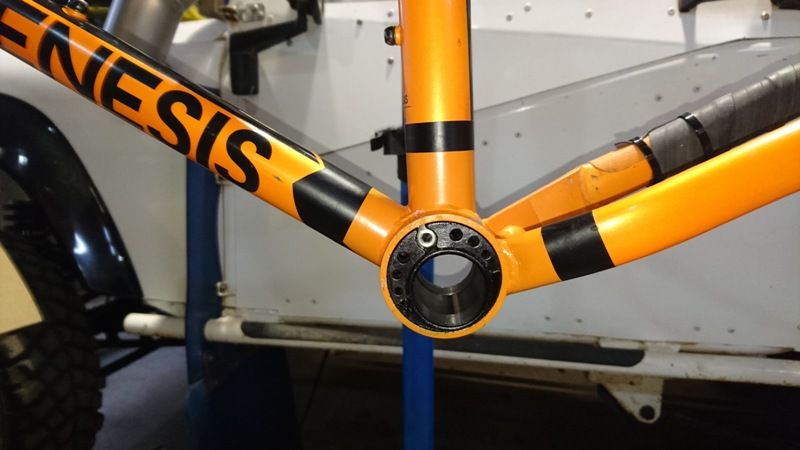
Bike back together and ready to go
The worst bit of he whole job was cutting the old BB out as the holesaw didn't have enough depth of cut so I had to cut part way through, then cut out the bit of BB, then holesaw some more etc. It was also pretty nerve-racking as once I'd started cutting there was no way back if it all went wrong.
I rode it for the first time this morning, only a flat 7.5 miles to work on a cycle path but seemed to ride ok. It's a proper off road test on the way home of 25 hilly miles in the dark which also has the advantage that I won't be able to see the new paint doesn't match
Sean
I then decided to revert to fitting a new BB shell myself, what's the worst that could go wrong? I bought the shell from Ceeway and a Bushnell EBB from Charlie the Bikemonger and got to work.
I made a jig to hold the frame parallel to the bench by measuring the size of the tubes and then selected/made spacers to suit.

Checking the frame is set correctly on my surface plate. The jig holds the frame such that the BB is 90 degress to the main steel section on the jig.

I then mounted the whole lot on the drill bed and cut out the old BB shell with a holesaw.

Checking the fit of the new BB shell, I had to fettle the cut on the tubes to get this to fit as I wanted. The top plate holds the BB shell in place for welding and the bottom one spaces it up as it's narrower than the threaded shell which was cut out.

I cleaned it all up with a small shot-blasting gun to get it nice and clean for welding.

I did consider welding it up myself as I have a small DC TIG but I've not used it in a few years so I'd have to get some Argon for shielding and get some practice in. I tracked down a friend of a friend who welded it up for me.

After painting the area and new BB shell I fitted the EBB. The new paint isn't the same shade as the original frame so I added some decals on the line where the colour changes to hide it. You can see the change in colour on the inside of the non-driveside chainstay but this is hidden with the wheel fitted.

Bike back together and ready to go

The worst bit of he whole job was cutting the old BB out as the holesaw didn't have enough depth of cut so I had to cut part way through, then cut out the bit of BB, then holesaw some more etc. It was also pretty nerve-racking as once I'd started cutting there was no way back if it all went wrong.
I rode it for the first time this morning, only a flat 7.5 miles to work on a cycle path but seemed to ride ok. It's a proper off road test on the way home of 25 hilly miles in the dark which also has the advantage that I won't be able to see the new paint doesn't match
Sean
