Page 1 of 1
First Post, Second Sewing Project, MYOG Frame Pack
Posted: Mon Mar 11, 2013 2:29 pm
by WhipperSnapper
Hi,
I'm new here, but i've been lurking around the bikepacking corners of the internet for a while now and finally decided to take the plunge.
I'm planning on sewing a frame bag and wondered if you guys had any advice, do's and don'ts, don't touch this with a long stick sort of thing?
For the material, is there a recommended weight or anything? and any advice about measuring it/sewing it together.
Being a student i'm on a bit of a budget so i'll tend towards the cheaper side of things but any advice will be much appreciated.
Thanks in advance
Oliver
Re: First Post, Second Sewing Project, MYOG Frame Pack
Posted: Mon Mar 11, 2013 2:50 pm
by Tanglefist
This might be really obvious, but make a full size model first - paper, card or even (heavy duty) bin bag and a lot of tape should work. You can use this to fine tune the design before slicing any material, and with some additions, use it as a template.
Also I find it really annoying to not be able to shoulder my bike when the frame bag is in, although I think this design provides a nice compromise;
http://www.englishcycles.com/wp-content ... gates2.jpg
Good luck!
Re: First Post, Second Sewing Project, MYOG Frame Pack
Posted: Mon Mar 11, 2013 3:44 pm
by Andrew
I have used cordura 500 and VX21 from Extremtextil, both fabrics are seconds and cheap. Have a look at my fb page and you can see how mine turned out. Mine is basic and i didnt bind the seams or have a liner fabric. The MTBR, backpackinglight and bikepacking forums all have excellent how tos.
It is a lot cheaper than buying from someone but only if you plan to make a few items as you need a sewing mahine, thread, zips, velcro cutting board, rotary cutter.
I have ordered some tyvek to make a jacket so I will see how that goes, best of luck.
Re: First Post, Second Sewing Project, MYOG Frame Pack
Posted: Tue Mar 12, 2013 10:27 am
by MM-on-POINT
If you do not have a a sewing machine you can use evostinck and strenghten your bonds with hand sewing a back stitch, the rip stop square gives you the perfect stitch guide.
Sew one square then back stitch to center of that square then sew to next square and repeat.
I have used this method on a bath tub ground sheet this weekend and although it is time consumeing it is cheap.
I will put you up a pic of my seems later to give you a idea of what it looks like.
Re: First Post, Second Sewing Project, MYOG Frame Pack
Posted: Tue Mar 12, 2013 11:40 am
by MM-on-POINT
using a hand sewing back stitch and then bonding the excess on the inside will give your project strength and will not require seem sealant.
I hope this helps
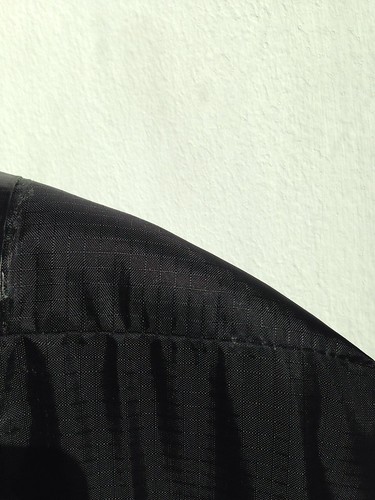 Seems with a simple back stitch
 by
MM-on-POINT, on Flickr
Re: First Post, Second Sewing Project, MYOG Frame Pack
Posted: Tue Mar 12, 2013 4:01 pm
by WhipperSnapper
Thanks for all the advice. I think i'll be able to borrow a sewing machine so hopefully that will make things easier and i might try that english cycles design, it seems useful. I know it sounds simple but what do i draw on the fabric with if its dark?
Re: First Post, Second Sewing Project, MYOG Frame Pack
Posted: Tue Mar 12, 2013 4:52 pm
by Ray Young
Tailors chalk is about £1.50 from any sewing type shop.
Re: First Post, Second Sewing Project, MYOG Frame Pack
Posted: Tue Mar 12, 2013 5:11 pm
by BRP
I made the bags on the English. I think a lot of people forget what a pain in the arse it is to even lift a loaded bike over logs etc with nowhere to easily pick the bike up.
I personally think the tiny corner of space you lose is more than worth it for the ability to pick the bike up more easily.
Good luck with your project! :]
Re: First Post, Second Sewing Project, MYOG Frame Pack
Posted: Tue Mar 12, 2013 9:40 pm
by Ming
I found this a while back, it offers a fairly detailed write up on MYOG framebags.
http://www.bikepacking.net/individual_s ... frame-bag/
Mark.