Unless you possess a particularly weighty sleeping bag, then chances are, the heaviest single piece of kit carried on your bike, is your shelter. If you favour a proper, double skinned tent in which to rest your weary head, then it’s almost a certainty … unless of course, you have very deep pockets. For those of us without said pockets or with surprisingly short arms, trying to reduce the weight of our shelter can sometimes lead to compromises we might not be happy to except and that’s especially true for those who prefer to fully batten down the hatches when night falls and outwardly cringe at thought of a bivvy bag or tarp. Finding a solution that’s affordable without incurring a long list of compromises can be a tricky business.
In my mind, the Alpkit Polestar is a proper tent. By ‘proper’, I mean it’s blessed with a separate breathable inner and a fully waterproof outer. However, although it’s a proper tent by that definition, it is a tent designed to be erected with trekking poles and while the inner keeps you safe from the creeping and crawling things, it’s perhaps more nest-like than some people may be used to. Many tents and shelters that find wide ranging approval amongst cycling’s great unwashed are similar but for some, they can be a step too far removed from the type of tent they’re used to. How you view it may all depend on which direction you’re approaching it from.
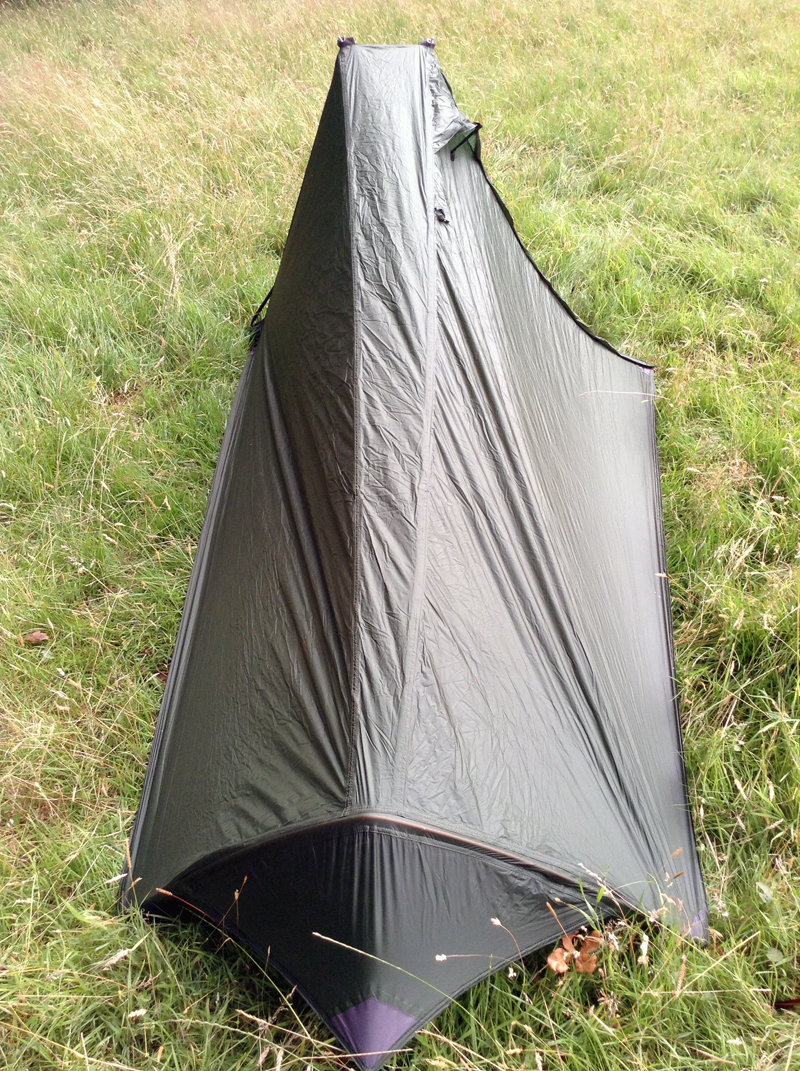
Although the Polestar isn’t supplied with the main poles, it does arrive with a pre-formed alloy one for the foot end plus all guy lines, a set of V profile aluminium pegs and some material swatches should it ever require repair. The entire thing tips the Bear Bones calibrated scales at 921g including stuff-sacks. That weight breaks down to, outer 415g, inner 304g, pegs 66g, pole 90g and 46g for the stuff-sacks. Often, pack size can be just as important as weight when trying to attach something to a bike and at around 45cm x 14cm, the Polestar may at first appear a little chubby. However, that size is largely dictated by the pole and if that’s stowed somewhere else, the remaining bundle can be compressed / squashed down to a fraction of it’s initial size and can easily be packed inside the average seatpack.
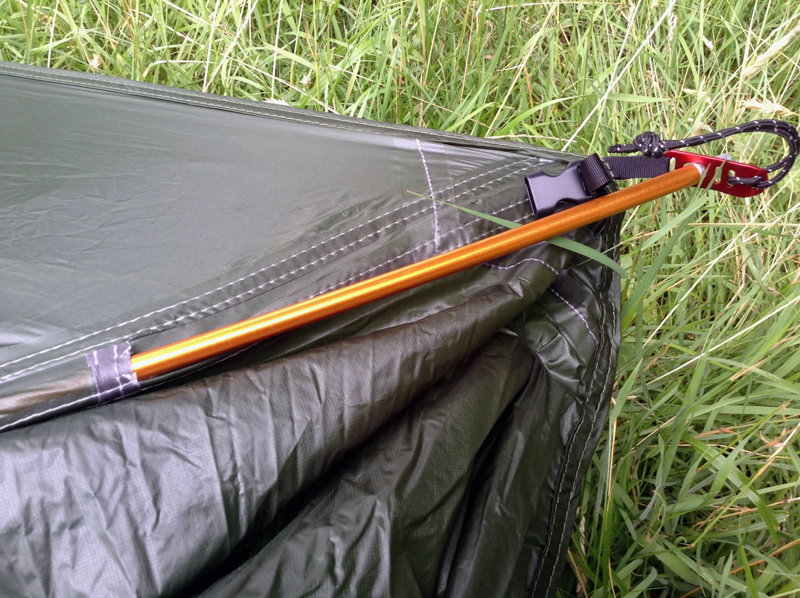
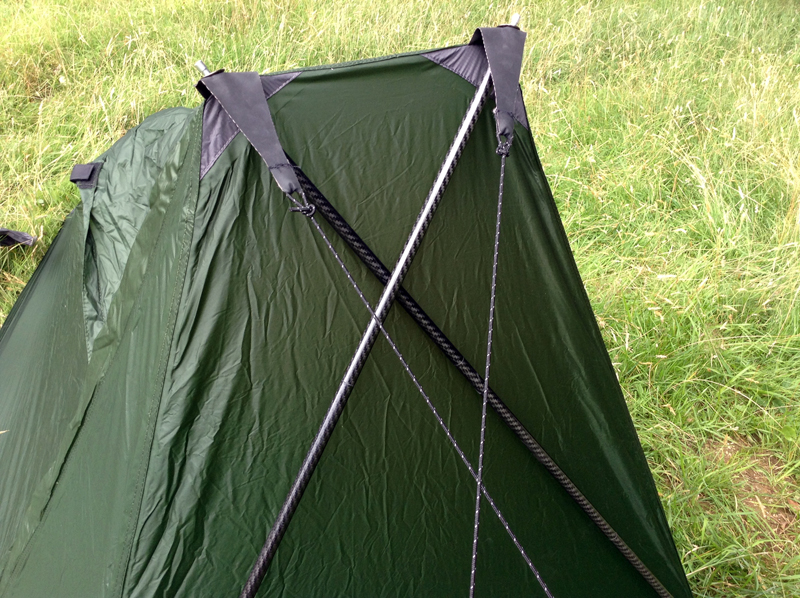
The inner attaches to the outer by way of toggles and clips. It’s easy to fit but will require a little crawling on your behalf; although once in place, it can be left there allowing the entire thing to be erected as one. However, should the winged teeth not be making your life a misery, you also have the option to leave the inner at home which will obviously provide more internal space and net a weight saving of 300g. Regardless of whether the inner is in place or not, set-up is relatively painless and pretty intuitive. Start by inserting the supplied pole into the sleeve at the bottom end – now, a word of warning here. Don’t go mad. The pole is a tight fit, so feed it in rather than shove it in and once in place, locate the pole ends into the aluminium housings. These too are a snug fit and will require you to bend the pole a little to both fit and remove, so again – don’t go mad. At this point, you can peg the foot end to the floor if you wish. Now turn your attention to the other end and using two poles of your own choosing, insert a spikey end into the grommet at the top before locating the other non-pointy end into the pocket at the bottom and then repeat with the second pole. The poles are meant to cross over and my experiments would suggest that the stated 120cm length is fine with trekking poles but add a couple of cm to each pole if you’re using something without a chunky handle. Once the poles are in place, peg out the three guy lines and the remaining points on the fly. Some pictures I’ve seen, show the two main guy lines running down and out from the pole eyelets but I’ve found the Hypalon ears sit much straighter if you cross the lines over so they mimic the poles.
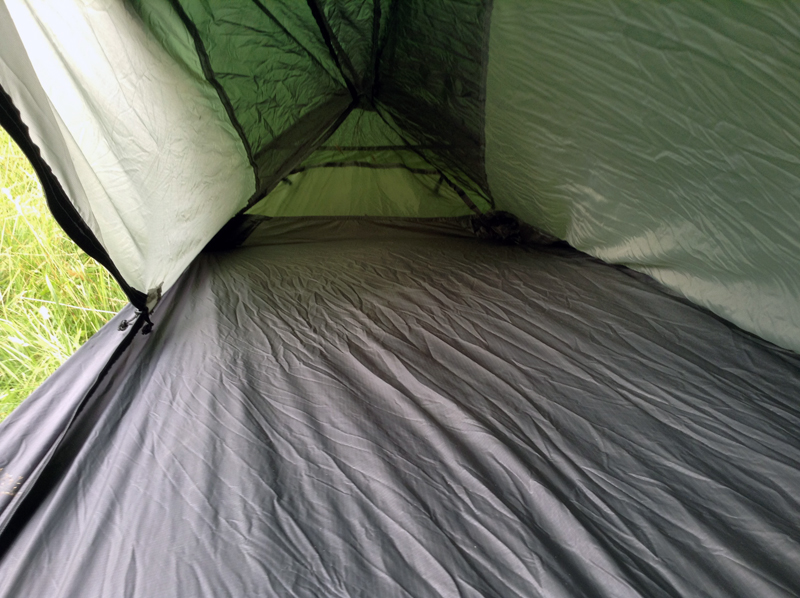
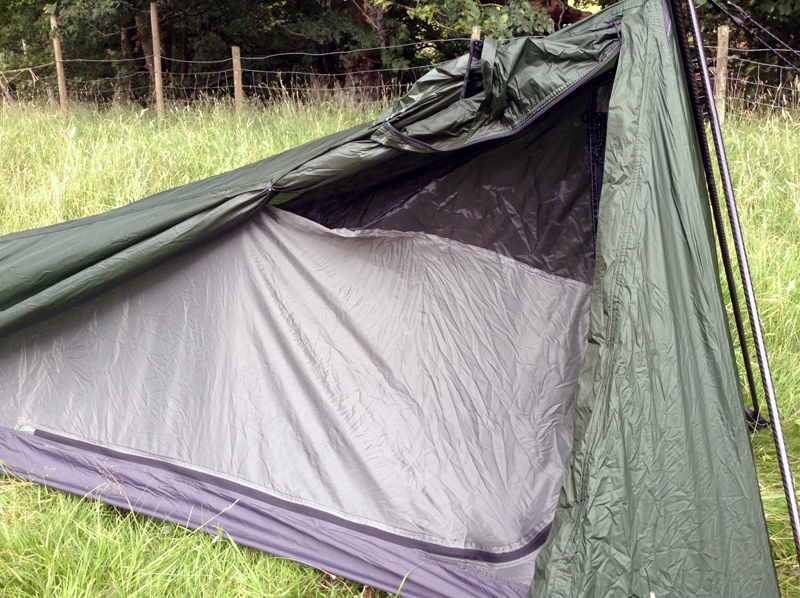
No matter what type of shelter you employ, adequate ventilation is critical and vents that allow air to both enter and leave at different points are by far the best way to minimise the potential for condensation. The Polestar has two vents; the first is a covered mesh panel placed low at the foot end and the second is above the door at the opposite end of the tent. That combination promotes good air flow through the tent and should help keep condensation levels low. Even the best vent system can only achieve so much though and if conditions are wrong (or right depending on your point of view), some moisture will inherently form on the inside of the fly. Having a separate inner does mean it’s generally seen as less of a problem than it would be on a single skin shelter, especially if there’s a substantial gap between the inner and outer layers and the Polestar scores well in this regard. I know some people will prefer an inner which is more taut but in reality, the ‘hanging’ nature of the Polestar’s mesh inner works fine and also helps keep the layers apart.
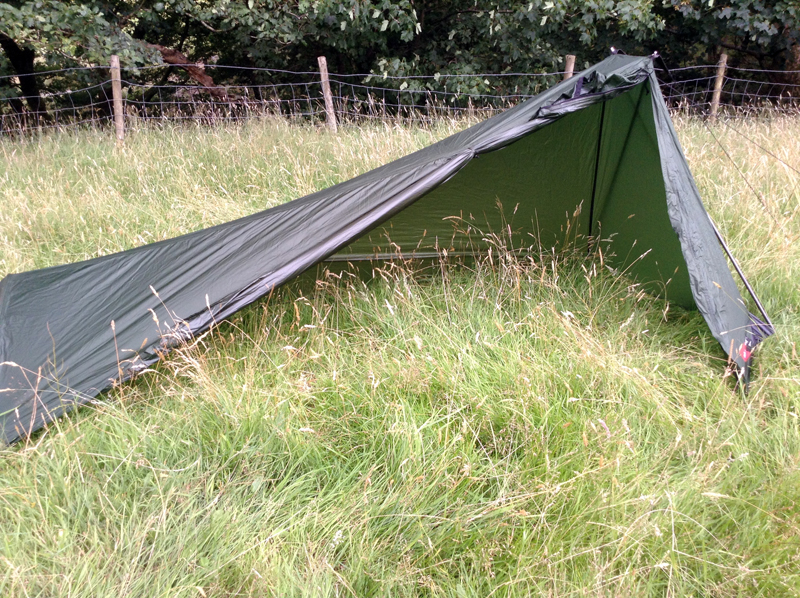
Although room inside might not be palatial, it’s certainly adequate. While I’m probably somewhat shorter than the national average, I was surprised by how long the inner was; even those taller than most should have little difficulty stretching out. As you might imagine, the width of the inner is less generous but it will easily accommodate a long / wide air mat which is really all that’s required of it. With an inner peak height of around 80cm you’re unlikely to be hanging any chandeliers but that figure is quite normal for single occupancy tents, so brushing your head against the inside is largely par for the course and obviously with the inner removed, that height increases to 100cm or so. Between inner and outer, there’s a long and narrow yet usable porch; although if you’re hoping to cook under cover (not advisable, entirely at your own risk, etc, etc) then I’d suggest using some kind of additional support to hold the door flap open and in doing so provide a ‘roof’ and therefor a safer covered ‘cooking’ area and more storage space.
Something I’ve not yet achieved is a perfectly taut pitch. Don’t misunderstand me, it’s pitches fine but so far, I’ve found there’s always some slack on the door side. I wonder whether it’s simply an inherent feature of the design given that the ‘head end’ is quite square but the ‘foot end’ is arched and obviously, there’s a transition from one to the other? Regardless of whether it is caused by the design or just by my incompetence, I’m sure it’s more an annoyance for those who suffer with OCD than it is a practical issue. It wouldn’t appear to reduce stability and nor does it flap should the wind appear.
At the beginning, I mentioned that the Polestar is a ‘proper’ tent and it very much is but as with anything which is parred down and occupies a position towards the lightweight end of the scale, you perhaps need to temper your expectations. I’m not saying that because I’m trying to make excuses for any failings. On the contrary, aside from the seemingly tight pole sleeve, I can’t find any shortcomings but there will be some people who expect an affordable lightweight shelter to perform in exactly the same way as a considerably more expensive heavyweight one does. I’m sorry but life’s not like that and they really do mean it when they say “you can’t have your cake and eat it”. Lightweight tents don’t tend to incorporate as many features and most whistles and bells have been removed to help reduce weight. They’re generally made from thinner materials which won’t handle unsympathetic treatment in the same way heavier materials will and lightweight tents are unlikely to be as spacious or as stable as those weighing a kilo more. If you accept these things from the outset, then the Polestar is a great shelter. It’s versatile, relatively light, packable and reasonably priced.
Available directly from Alpkit for £139.99
If you’d like some carbon poles like those in the pictures here – give me a shout.